
Hey there, snack lovers! If you’re anything like me, the thought of Butterfinger Balls gets your taste buds dancing. These sweet and salty treats are a crowd-pleaser for parties, holidays, or just when you’re craving something delicious. But what makes them so special? Why do people go crazy over these little chocolate-coated delights? And most importantly, how can you make them at home without breaking a sweat?
In this article, we’ll dive into everything you need to know about Butterfinger Balls. From their history to creative variations, storage tips, and even some fun FAQs, we’ve got it all covered. Let’s get started with the basics—because honestly, who doesn’t love starting with the good stuff?
Table of Contents
Introduction to Butterfinger Balls
What Are Butterfinger Balls?
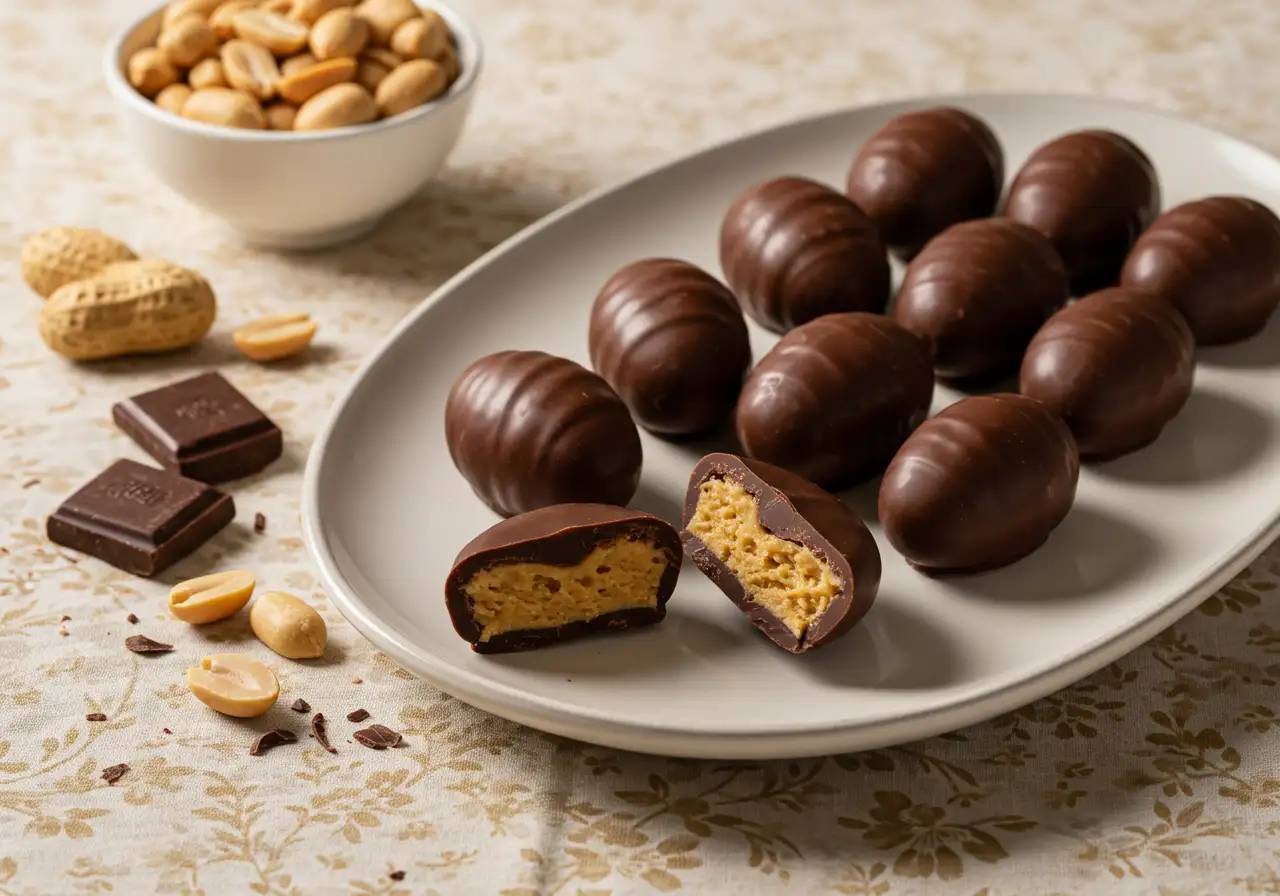
If you’ve never heard of Butterfinger Balls, let me tell you—they’re basically candy heaven wrapped up in bite-sized goodness. These no-bake treats combine crushed Butterfinger bars with creamy peanut butter and powdered sugar, rolled into balls and dipped in melted chocolate. It’s like taking everyone’s favorite candy bar and turning it into an even more irresistible dessert.
Let’s face it, though—these aren’t just any old balls of sweetness. They’re packed with that signature crunchy, peanut buttery flavor that only Butterfinger can deliver. Plus, they’re super easy to whip up, making them perfect for last-minute gatherings or lazy Sunday afternoons. Who needs fancy baking skills when you can toss together ingredients in minutes?
Why Butterfinger Balls Are a Fan Favorite
There’s something magical about combining salty and sweet flavors, and Butterfinger Balls nail it perfectly. Whether you’re a kid at heart or someone who appreciates gourmet snacks, these treats hit the spot every time. Not to mention, they’re versatile enough to fit almost any occasion. Need a quick gift idea? Wrap a few in festive paper. Hosting a party? Set out a tray of these bad boys, and watch them disappear faster than you can say “yum!”
And hey, don’t worry if you’re not exactly Martha Stewart in the kitchen. Making Butterfinger Balls is straightforward, fun, and totally forgiving. So grab your apron (or skip it altogether), and let’s move on to learning where this tasty tradition comes from!
Up next: A brief history lesson on why Butterfinger has been stealing our hearts—and stomachs—for decades. Stay tuned!
A Brief History of Butterfinger Candy and Its Influence on Desserts
The Origins of Butterfinger Candy
Alright, let’s take a little trip down memory lane. You know that Butterfinger bar you’ve been munching on for years? Well, it’s been around way longer than you think! Created back in 1923 by the Curtiss Candy Company, this iconic candy bar quickly became a household name thanks to its crunchy exterior and creamy peanut butter filling. Can you believe it’s almost a century old? That’s right—this sweet sensation has been delighting taste buds for generations.
And guess what? Over time, people started realizing that Butterfinger wasn’t just meant to be eaten straight out of the wrapper. Oh no, they got creative—and thus began the rise of Butterfinger Balls and other dessert wonders. But how did we get here? Let’s find out.
How Butterfinger Inspired Dessert Creations
Fast forward to today, and you’ll see that Butterfinger Bars have inspired countless recipes, from cookies to cakes and, of course, our beloved Butterfinger Balls. Why do you think that is? For starters, the combination of crunch and creaminess makes it an ideal ingredient for desserts. Plus, who doesn’t love adding a bit of nostalgia to their baking projects?
As more home cooks experimented with crushed Butterfinger pieces, the idea of turning them into bite-sized treats like Butterfinger Balls took off. These little spheres of happiness are now a staple at potlucks, birthday parties, and holiday gatherings. And honestly, can you blame anyone? They’re easy to make, fun to eat, and guaranteed to bring smiles to faces everywhere.
So next time you’re enjoying a batch of Butterfinger Balls, remember—you’re partaking in a tradition that dates back nearly a hundred years. Pretty cool, huh? Now, let’s roll up our sleeves and learn exactly how to recreate this magic in your own kitchen. Shall we?
How to Make Classic Butterfinger Balls at Home
Gathering Ingredients for Butterfinger Balls
Now comes the exciting part—making your very own Butterfinger Balls! First things first, gather all the ingredients. Here’s what you’ll need: crushed Butterfinger bars, creamy peanut butter, powdered sugar, and chocolate coating. Easy peasy, right? If you want to save time, pick up pre-crushed Butterfinger bits or crush them yourself using a food processor or ziplock bag and rolling pin.
Oh, and one quick tip before we dive in—if you’re short on time, use store-bought chocolate chips instead of melting chocolate bars. Trust me, it works just as well!
Step-by-Step Instructions
Ready to get started? Follow these simple steps:
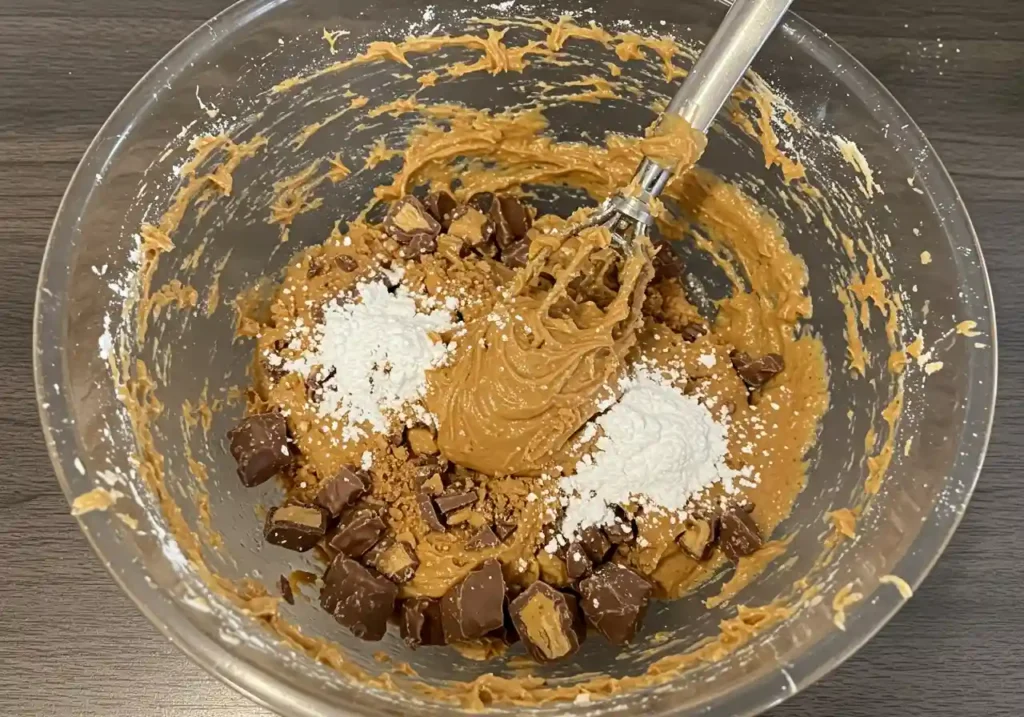
- Mix It Up: In a large bowl, combine the crushed Butterfinger bars, peanut butter, and powdered sugar until everything is evenly blended. This step might feel messy, but hey, that’s half the fun!
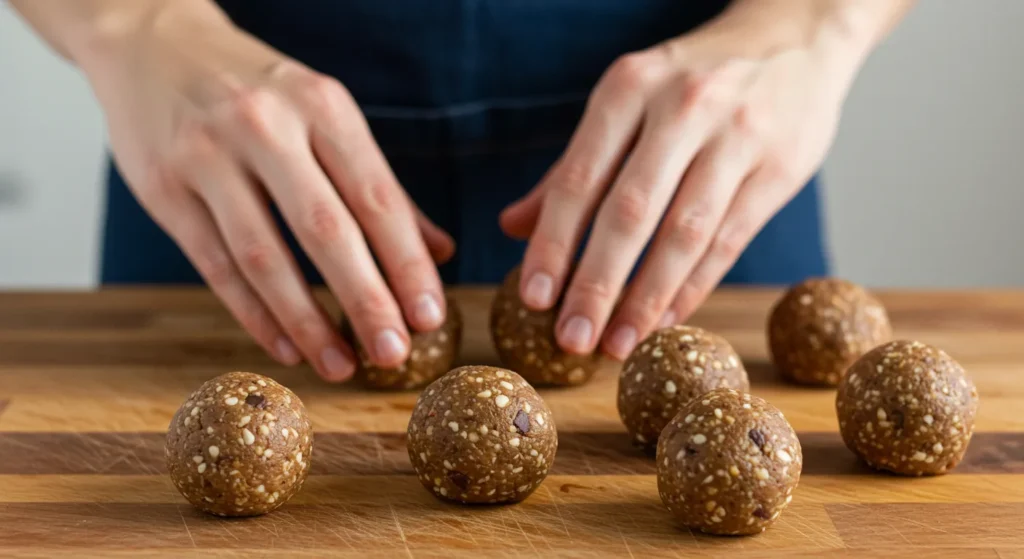
- Shape Those Balls: Using your hands (or a cookie scoop if you’re feeling fancy), form the mixture into small, round balls. Don’t stress too much about perfection—imperfect shapes add charm.
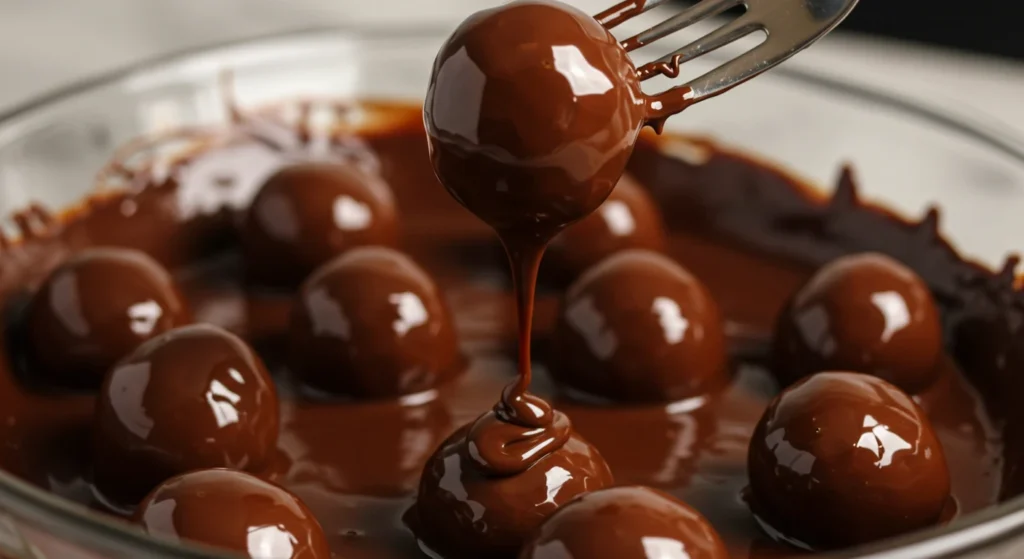
- Coat Them in Chocolate: Melt your chocolate according to package instructions, then dip each ball into the melted goodness. Use a fork to lift them out and let the excess chocolate drip off.
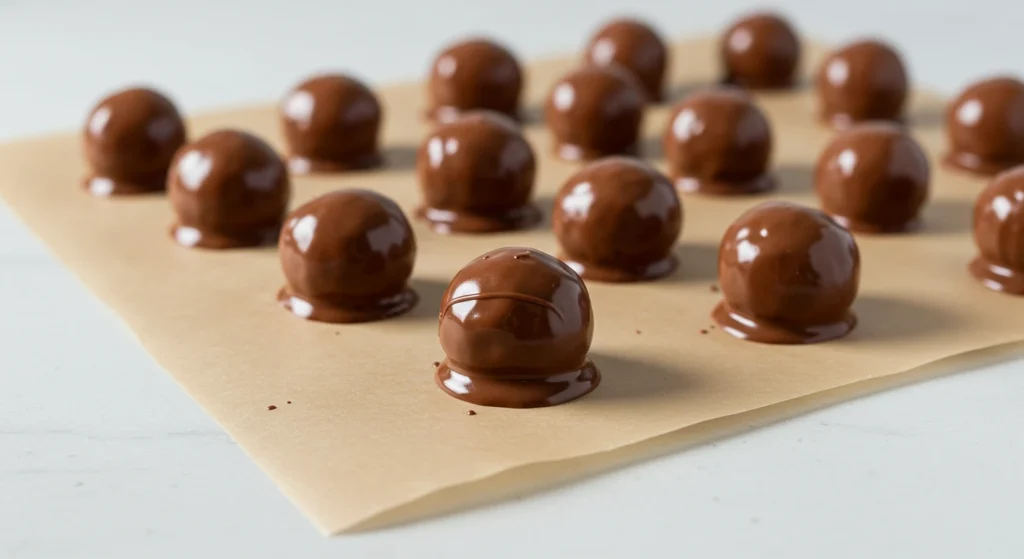
- Let Them Set: Place the coated Butterfinger Balls on a sheet of parchment paper and refrigerate for about 30 minutes. Voilà—they’re ready to devour!
Tips for Perfect Butterfinger Balls
Here’s the thing: while making Butterfinger Balls is pretty straightforward, there are still a few tricks to keep in mind. For instance, if the mixture feels too sticky, add a bit more powdered sugar. On the flip side, if it’s too dry, toss in a splash of milk or cream. And don’t forget to work quickly when dipping the balls in chocolate—it sets faster than you’d expect!
With these tips under your belt, you’ll be churning out flawless Butterfinger Balls in no time. So go ahead, give it a try, and enjoy the fruits of your labor. Next up, we’ll explore some creative twists to shake things up a bit. Stay tuned!
Creative Variations of Butterfinger Balls
Butterfinger Balls with Added Flavors
Who says Butterfinger Balls have to stick to the classics? While the original recipe is undeniably delicious, adding a few extra ingredients can take these treats to the next level. For instance, why not mix in some caramel chunks for an extra gooey surprise? Or sprinkle chopped nuts for a satisfying crunch that complements the peanut buttery goodness.
If you’re feeling adventurous, consider tossing in a handful of colorful sprinkles before dipping the balls in chocolate. Not only does this add visual appeal, but it also brings a playful touch that kids and adults alike will adore. And if you’re hosting a party, themed variations—like red and green candies during Christmas or pastel hues for Easter—are sure to impress your guests.
Vegan and Gluten-Free Butterfinger Balls
Let’s not forget about our friends with dietary restrictions! Believe it or not, you can still enjoy Butterfinger Balls without animal products or gluten. Swap traditional peanut butter for almond butter or sunflower seed butter, and use powdered sugar made from coconut palm sugar instead of refined white sugar. As for the chocolate coating, opt for dairy-free chocolate chips or melt dark chocolate bars labeled as vegan-friendly.
For those avoiding gluten, double-check that your powdered sugar and chocolate are certified gluten-free. Most store-bought options should work fine, but it never hurts to read labels carefully. By making these simple swaps, everyone at the table can indulge guilt-free.
Miniature Butterfinger Balls for Parties
Here’s a fun idea: make mini versions of Butterfinger Balls for parties or events. Smaller portions are easier to eat and perfect for sharing. Plus, they look adorable on dessert trays or in cupcake wrappers. If you want to go all out, arrange them in a decorative platter with other no-bake treats like Rice Krispie Treats or chocolate-dipped pretzels.
For more delicious recipes, check out our article on No-Bake Desserts That Will Blow Your Mind. You won’t regret it!
Healthier Versions of Butterfinger Balls
Reducing Sugar Without Losing Flavor
If you’re looking to lighten up your Butterfinger Balls, there are plenty of ways to do so without sacrificing taste. Start by using less powdered sugar in the mixture—you’d be surprised how much sweetness comes from the crushed Butterfinger alone. Another option is swapping regular chocolate for dark chocolate, which contains fewer added sugars and offers antioxidant benefits.
Nutrient-Rich Additions
To boost the nutritional value of your Butterfinger Balls, consider incorporating healthier ingredients. Chopped almonds, walnuts, or flaxseeds provide fiber and healthy fats, while a sprinkle of cinnamon adds natural sweetness and anti-inflammatory properties. If you’re feeling extra ambitious, try blending in a tablespoon of protein powder for an energy-packed snack.
Remember, moderation is key. Even with healthier tweaks, these treats are still indulgent, so enjoy them in small amounts. After all, life’s too short not to savor every bite! For more ideas on nutritious desserts, head over to our article on Healthy Snacks That Won’t Ruin Your Diet.
Storing and Serving Butterfinger Balls
Best Practices for Storing Butterfinger Balls
Alright, you’ve made your Butterfinger Balls, and they look absolutely amazing. But how do you keep them fresh so they last as long as possible? First off, store them in an airtight container to prevent air from drying out the chocolate coating or making the peanut butter mixture go stale. If you’re planning to serve them within a few days, the countertop works fine, but if you want them to stay fresh longer, pop that container into the fridge. Just remember to take them out about 15 minutes before serving—cold treats can feel harder than they actually are!
Another tip? Layer parchment paper between rows of balls in the container. This prevents sticking and keeps everything looking neat and tidy. And hey, if you’ve got leftovers after a party (which is rare, trust me), freezing is always an option. Simply place the balls on a baking sheet, freeze until solid, then transfer to a freezer-safe bag. They’ll keep for up to three months this way.
Creative Ways to Serve Butterfinger Balls
Now, let’s talk presentation because, honestly, who doesn’t love a well-styled dessert? For casual gatherings, drop the Butterfinger Balls into cute mini cupcake liners—it makes them easier to grab and adds a festive touch. At formal events, arrange them on a tiered cake stand surrounded by other no-bake goodies like truffles or cookies. Need a gift idea? Package a dozen in a cellophane bag tied with ribbon. Voilà—instant charm!
For more creative serving ideas, check out our article on Stylish Dessert Displays.
Frequently Asked Questions About Butterfinger Balls
Do Butterfinger BB’s Still Exist?
Ah, the legendary Butterfinger BBs ! These little peanut buttery nuggets were a snack favorite for many. Unfortunately, they were discontinued in 2019, much to the disappointment of fans. However, don’t lose hope just yet! While the official product isn’t available anymore, you can recreate the magic at home with your very own Butterfinger Balls . They’re basically the homemade version of those beloved BBs—crushed Butterfinger bars mixed with peanut butter and coated in chocolate. Who needs store-bought when you can make them yourself?
Why Was Butterfinger Discontinued?
The discontinuation of certain Butterfinger products, like the BBs, often comes down to business decisions. Sometimes, companies decide to focus on their most popular items or test new flavors instead of keeping older ones around. It’s not always about lack of demand but more about shifting priorities. That said, the classic Butterfinger bar is still going strong, so you’ll never run out of material for your Butterfinger Balls !
What Is the Orange Stuff in Butterfingers?
Great question! The “orange stuff” inside a Butterfinger bar is actually a combination of peanuts, sugar, corn syrup, and other ingredients that give it its signature creamy texture and nutty flavor. This filling is what makes Butterfinger unique—it’s light, fluffy, and oh-so-delicious. When crushed, this part mixes beautifully with peanut butter to create the base of Butterfinger Balls .
What Is the Stuff Inside a Butterfinger Called?
The gooey, peanut-flavored center inside a Butterfinger doesn’t have an official name, but fans affectionately refer to it as the “peanut butter crunch” layer. Technically, it’s a mixture of ground peanuts blended with sugar and corn syrup, giving it that irresistible crunch and creaminess. This is the star ingredient in Butterfinger Balls , bringing all the flavors together into one delightful treat.
Can I use other candy bars instead of Butterfinger?
Absolutely! While Butterfinger Balls get their signature flavor from—you guessed it—Butterfinger bars, you can experiment with other candies. Reese’s Pieces, Snickers, or even Twix work great depending on what kind of taste profile you’re aiming for. Just crush them finely and follow the same recipe steps.
How long do Butterfinger Balls last?
If stored properly in an airtight container at room temperature, Butterfinger Balls should stay fresh for about five to seven days. In the fridge, they’ll last closer to two weeks. Freezing extends their shelf life significantly, so don’t hesitate to stash extras away for later.
Are Butterfinger Balls easy to make?
You bet! These treats require zero baking skills and come together in under 30 minutes. The hardest part might be waiting for the chocolate to set, but trust me, it’s worth it.
Still have questions? Feel free to leave a comment below—we’d love to help!