Valentines Day cake pops, Who doesn’t love a bite-sized treat that’s as cute as it is delicious? Valentines Day Cake Pops are the ultimate festive dessert for the season of love. They’re fun to make, easy to customize, and perfect for bringing a little sweetness to any Valentine’s celebration. Whether you’re prepping for a romantic date, a Galentine’s party, or just treating yourself (because you deserve it!), these adorable pops have you covered.
This guide will walk you through everything you need to know about making these little delights. From gathering the right ingredients to mastering the dipping technique, it’s all here. Plus, we’ll sprinkle in some creative ideas for decorations that’ll wow your Valentine (or Instagram followers—no judgment). If that’s not enough, we’ll share storage hacks and pro tips so your cake pops turn out smooth, tasty, and oh-so-pretty every single time.
Grab your mixing bowls and candy melts, and get ready to whip up a batch of chocolate-dipped treats that are almost too cute to eat. Almost. Trust me, by the time you finish reading this, you’ll be itching to try your hand at crafting some Valentine’s magic!
Table of Contents
Ingredients and Supplies Needed
Essential Ingredients for Cake Pops
Before you get started on your Valentines Day cake pops, make sure you’ve got all the essentials. The beauty of this recipe is that it’s simple, but each ingredient plays a key role in making these bite-sized treats a hit:
- Cake Mix – Grab your favorite flavor! Chocolate, vanilla, red velvet, or even strawberry works perfectly. Boxed cake mix is a time-saver, but feel free to make one from scratch if you’re feeling fancy.
- Frosting – This helps bind the cake crumbs together. Buttercream or cream cheese frosting works best, but you can mix it up depending on your cake flavor.
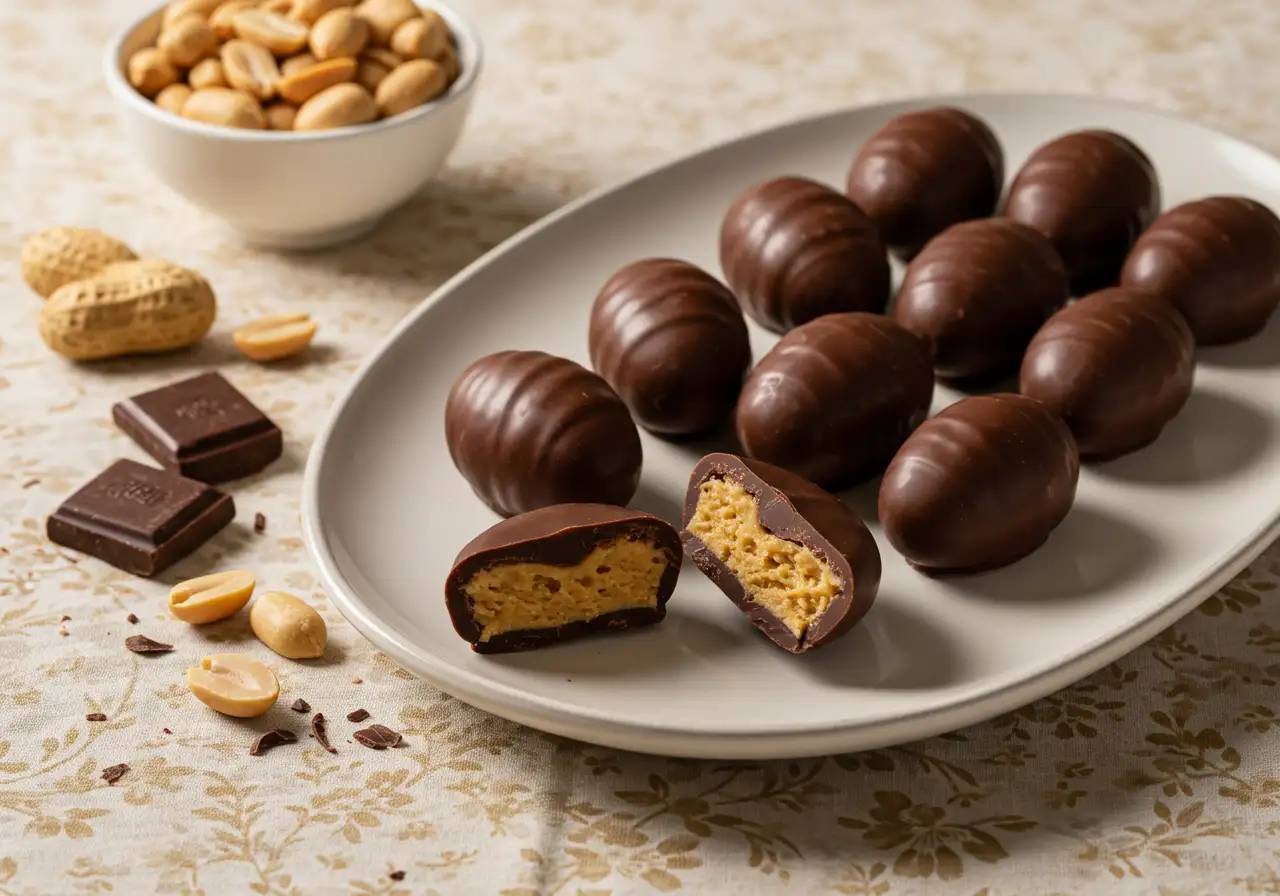
- Candy Melts or Baking Chocolate – Pick colors that scream love—pink, red, or white! If you’re aiming for bold, glossy pops, candy melts are your best friend.
- Decorations – Think sprinkles, edible glitter, or custom Valentine-themed candies. These small details take your cake pops from simple to “wow!”
Tools and Equipment Checklist
Having the right tools on hand will make your Valentines Day cake pops experience smooth and stress-free. Here’s what to grab:
- Mixing Bowls – For crumbling the cake and mixing frosting into a dreamy, dough-like consistency.
- Lollipop Sticks – These transform your cake balls into actual cake pops. Plus, it’s way more fun to eat them this way!
- Cookie Scoop or Spoon – To ensure all your cake balls are the same size—you want them looking slick and professional.
- Microwave-Safe Bowls – Perfect for melting candy melts or chocolate evenly.
- Lined Baking Sheet – To keep your cake balls in order while they’re chilling.
- Styrofoam Block or Stand – A lifesaver for drying your dipped cake pops upright. If you don’t have one, get creative with a cardboard box!
With these in hand, you’re all set to create stunning Valentine’s treats!
Step-by-Step Guide to Making Valentines Day Cake Pops
Bake the cake: Prepare and bake the cake according to the box instructions. Let it cool completely.
Crumble the cake: Once cooled, crumble the cake into fine crumbs in a large bowl. Stir in the frosting, a little at a time, until the mixture holds together when pressed.
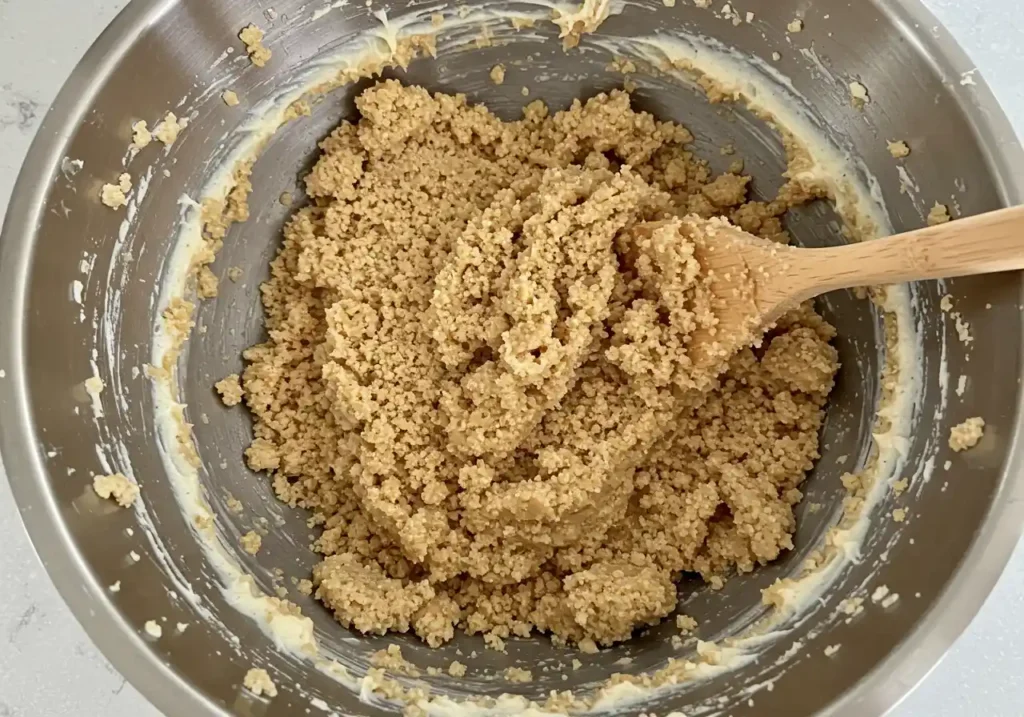
Shape into balls: Roll the mixture into 1-inch balls and place them on a baking sheet lined with parchment paper. Chill in the fridge for 1 hour or freeze for 15-20 minutes.

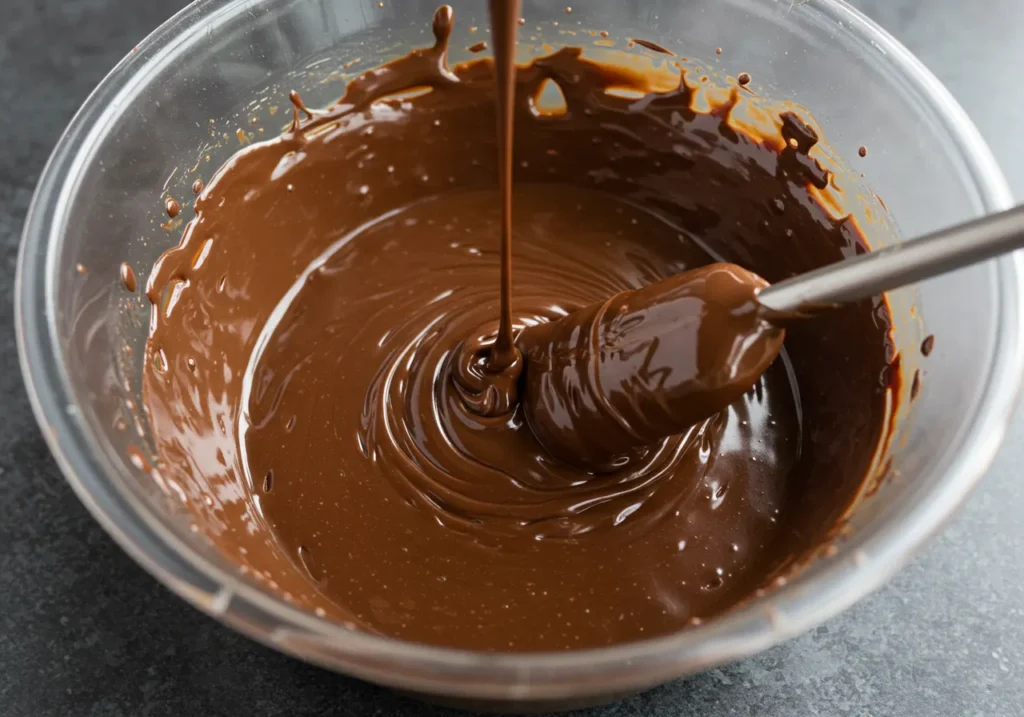
Melt the coating: Melt the chocolate chips or candy melts in a microwave-safe bowl in 30-second intervals, stirring between each interval, until smooth. Stir in coconut oil if desired.
Assemble the cake pops: Dip the tip of each lollipop stick into the melted chocolate, then insert it halfway into a cake ball. Let this set for 5 minutes to secure the stick.
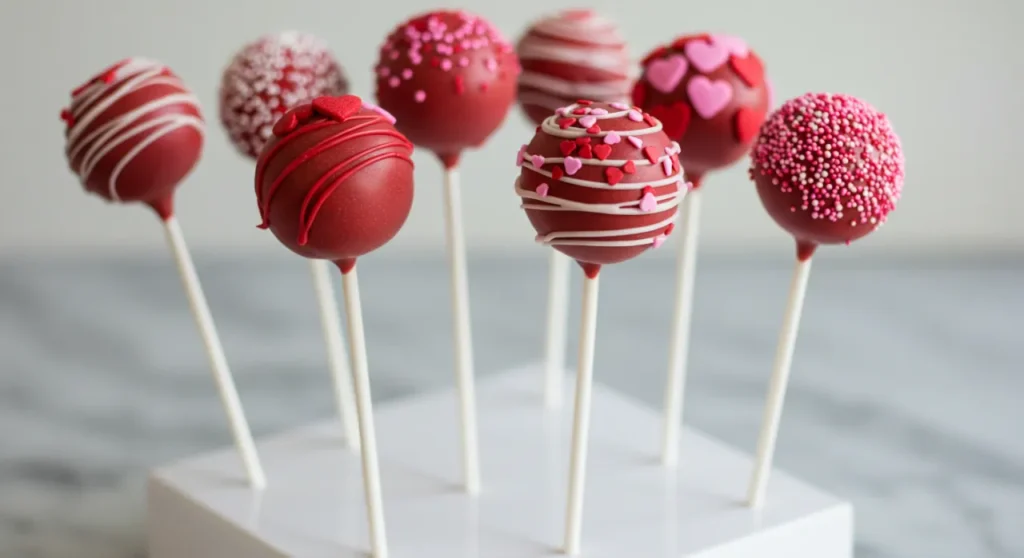
Dip and decorate: Dip each cake ball into the melted chocolate, covering it completely. Gently tap off any excess chocolate. Quickly sprinkle with Valentine’s-themed sprinkles before the chocolate hardens.

Let them set: Place the cake pops upright in a styrofoam block or a cake pop stand to set. Once hardened, they’re ready to serve or gift!
Once you’ve nailed these steps, your chocolate-dipped treats will look (and taste) like they belong in a bakery window.
Creative Decoration Ideas for Valentines Day Cake Pops
Using Sprinkles, Jimmies, and Drizzles
Decorating Valentines Day Cake Pops is where your creativity can truly shine! A simple way to jazz them up is by using colorful sprinkles or jimmies. Red, pink, and white sprinkles are classic choices, but don’t stop there. Heart-shaped candies, edible glitter, or pearl-like decorations can all add a touch of elegance or playfulness.
For a polished look, cover the cake pops while the chocolate coating is still wet to ensure the sprinkles stick perfectly. Want to take it up a notch? Try adding a drizzle of chocolate on top. Use a spoon or piping bag for more control, and go for contrasting colors—like red drizzle over white-coated pops or pink over chocolate—to create a striking effect. The best part? There’s no right or wrong way to decorate!
Themed Designs and Color Combinations
If you’re going for a themed look, think hearts, polka dots, or even writing cute words like “LOVE” with edible icing pens. To achieve a marble effect, swirl two candy melt colors gently before dipping your cake pops.
Color combinations are key to tying the Valentine’s theme together—mix and match shades of pink, red, and white for festive flair. Want to experiment? Add a golden or silver accent for a glamorous twist.
Tip: If you’re looking for more seasonal dessert ideas, check out our other recipes for Valentine-inspired cookies or easy heart-shaped cupcakes. You’ll find plenty of inspiration there!
Tips for Perfect Cake Pops Every Time
Common Mistakes to Avoid
Even the pros have mishaps, but a few tips can help you avoid frustrating mistakes. First off, don’t go overboard with frosting—it’s tempting, but too much can make your cake pops heavy and greasy. Stick to adding a small amount at a time and test the consistency frequently.
On the other hand, pay attention while melting the chocolate. Overheating can cause it to clump or burn. Use 30-second intervals in the microwave, stirring after each session to keep it silky smooth.
Lastly, don’t skip chilling the cake balls! They need to be cold and firm before you dip them, or you’ll risk them falling apart in the candy coating.
Pro Tips for Smooth Dipping and Shaping
For that flawless, bakery-style look, here are some lifesaving tips. Use a deep cup for dipping—this allows the cake pop to be fully submerged and coated evenly without awkward angles. A gentle tap on the cup’s edge helps remove excess chocolate while preventing drips.
To keep your cake balls perfectly round, give each one an extra roll between your hands after chilling. This smooths out edges and cracks that may have formed in the freezer.
Bonus tip? Your Valentines Day Cake Pops will harden beautifully if you use a stand to dry them upright. No stand? Improvise with a foam block or even a box filled with rice or beans. It’s all about those clever hacks!
For more foolproof tips and tricks, check out another one of our dessert guides—you won’t regret it!
Storage and Make-Ahead Options
How to Store Cake Pops
You’ve poured your heart into crafting those Valentines Day Cake Pops, so naturally, you’ll want to keep them fresh! If you’re planning to serve them within a day or two, storing them at room temperature works just fine. Arrange the pops in an airtight container and keep them in a cool, dry spot—away from direct sunlight or heat sources. This keeps the chocolate coating from melting or separating.
If it’ll be longer than two days, refrigeration is the way to go. Place the pops in a sealed container lined with a paper towel to absorb any moisture. This helps maintain that perfect texture and prevents condensation from messing up your decorations.
Freezing and Thawing Tips
Want to prep your Valentines Day Cake Pops ahead of time? No problem—they freeze beautifully! Once your cake pops are fully decorated and dried, wrap them individually in plastic wrap to avoid freezer burn. Then, place the wrapped pops in a freezer-safe container or bag for added protection.
When you’re ready to serve, simply thaw them at room temperature for about an hour. To avoid condensation ruining the coating, unwrap them after they’ve warmed up a bit. Voila! They’ll look and taste just like they were made fresh.
For more storage tips, check out other easy dessert recipes that can also be prepped in advance for any occasion!
FAQs About Valentines Day Cake Pops
Why are my cake pops falling off the stick?
Ugh, there’s nothing more frustrating! But don’t worry—it’s a fixable problem. The most common culprit is skipping the step of chilling the cake balls before dipping. Cold cake balls are your best friend because they’re firmer and less likely to slide off.
Another tip? Dip the end of your stick into melted chocolate before inserting it into the cake ball. This acts as a glue to keep everything in place. Finally, make sure you’re using just enough frosting to bind the crumbs together. Too much frosting can make the mixture heavy and more prone to falling apart.
Can I use different types of frosting?
Absolutely! While classic buttercream is a go-to for Valentines Day Cake Pops, cream cheese frosting, chocolate ganache, or even flavored frostings like strawberry or caramel work wonderfully. Keep in mind, though, that the type of frosting can slightly alter the texture and flavor of the cake pops. Want something tangy? Go with cream cheese. Feeling indulgent? A rich ganache pairs beautifully with chocolate cake pops.
Experiment and have fun! And if you’re curious about more ways to flavor your desserts, don’t forget to check out our other tasty recipe guides. You might just discover a new favorite combo!
Conclusion and Final Thoughts
Recap of Key Points
Making Valentines Day Cake Pops might sound tricky at first, but it’s actually a super fun process. From preparing the cake base to experimenting with creative decorations, this guide covered all the steps to help you nail it. Remember the key tips like chilling the cake balls, using just the right amount of frosting, and carefully dipping them for a smooth finish. With the right ingredients, tools, and a sprinkle of patience, you’re all set to create cake pops that’ll wow your loved ones!
Encouragement to Try Making Them
Now it’s your turn to give it a shot! Whether it’s for a Valentine’s party, a special gift, or just because you’re craving a sweet, festive treat, Valentines Day cake pops are worth the effort. And hey, even if they don’t look perfect, the love you put into making them will make them taste even better. Go ahead—grab some sprinkles and candy melts, and get baking! You’ve got this.
Got more baking questions or looking for inspiration? Check out our other dessert recipes—they’re packed with sweet ideas to keep you busy in the kitchen!